Showing posts with label Testing. Show all posts
*This pattern was given to me for free in exchange for testing before it's release. This post also contains affiliate links to help me buy more ramen noodles.*

I sure am fond of knotted tops. They add a fun and interesting detail to an otherwise "normal" tee. It's a top I can feel good about sewing in a solid because, it's already fun enough. :) 

The newest knot style top on the market comes from Itch to Stitch. The owner and designer, Kennis, has impeccable drafting skills and this pattern is no exception.


This pattern design features a front knot, long sleeves, elbow length sleeves, or a fun and cute flutter sleeve, all with a modest neckline, and a banded neck. Over all, it's pretty beginner friendly and the clear digital drawing instructions make the knot pretty simple!


I chose a basic heather grey DBP from my stash that I purchased ages ago from Sincerely Rylee.  So so cozy.


One interesting detail about the Nottingham Top is that the sleeves are inset and designed to where the sleeve seam doesn't align with the side seam of the top. Kennis based this off of athletic wear patterns to have the sleeve fit better and cause less stress on the seams. I will say the sleeves are supremely comfortable. She also includes lots of notches which makes sewing a set in sleeve a total breeze. I honestly didn't even have to baste it!


Despite that this top isn't designed for maternity, I believe it will work really well for moms-to-be well into their second trimester. If you wanted to lower the neckline, it would also work for nursing after the baby is born. Just an idea. :)


This pattern comes in sizes 00-20, has layered pieces, clear instructions, digital drawings to aid with the written instructions, 3 sleeve lengths, and sews up quickly! Also, despite the pattern calling for 1 yard and 1/8th, I was able to fit my size 2 top into a single yard. 


This top is on sale for $8 right now and you can find it at ItchtoStitch.com! Don't miss out, this will be a summer staple!
It's been a little while since I've tested a pattern. I've been really loving finding my style and creating garments without a deadline and sewing up some older patterns I've owned for awhile. However, whenever Angelynn releases a new workout pattern, I love, love testing those! I end up using her patterns again and again for athletic attire. They always fit me so well and the instructions are always great.❤ 

I present the Xpress Tank from Greenstyle Creations! 


Bet you can't guess why it's called the 'Xpress Tank' ... ok, maybe you can. This literally takes 20 minutes from start to finish and I'll have it be known that I sew like a sloth. The Xpress is ONE pattern piece and only TWO seams and a quick hem a around the entire thing. 


For being one piece without darts, it fits surprisingly well! The tie back allows you to make the waist snug with room for your chest and waist. You also have a pointed back option and a round back option.  My favorite thing about this tank is that it has the cute crisscrossing on the back. Brings something special to an otherwise simple style. I've also noticed it's a RTW style. Lots of brands I follow are selling these similar tanks for $40. I made mine for under $10! It also pairs well with the Moxi shorts I sewed last summer. (Check out the review here) 


I was absolutely delighted that I had picked some Underarmour Wickaway fabric from my last order with Simply By Ti fabrics. I only picked up one yard , but that's all you need for any size of the Xpress Tank. This fabric doesn't have a ton of stretch, but it's perfect to use on the tie back. You have a little more flexibility with the tie back having those extra long tails. It's also wicking and a great color. Ti actually carries this fabric in purple, jade (pictured), and navy! 


This pattern comes in sizes 3XS to 3XL and every size uses only one yard! The pattern is no trim pages and has illustrated, detailed instructions to help you create a beautiful garment.


I sewed the XS based on my bust measurement and it fits great! I made a design choice to use the 'wrong side' of my coverstitch. I've seen this done in casual RTW clothes and thought it looked cute.  This is also the perfrct canvas to sport some HTV. I have a silhouette but have yet to set it up since we moved. A lot of testers used designs for their Xpress tanks and it looks great. Hoping to use some soon to create my own custom tank.

Also, don't forget that Greenstyle is holding a fitcapsule challenge to sew up three Greenstyle active-ware pieces to be entered to win some great prizes. There is still plenty of time as the challenge doesn't end until February 28th! You can join the fun on Facebook and see inspriation here. (P.S. There is a great coupon code for Simply by Ti Fabrics in the group as well!)  

Details
Size: XS

This post does contain affiliate links for the pattern, thank you for supporting me in my sewing!
*This post contains affiliate links to help fund my wine and whine obsession*

***Greenstyle patterns are 25% off right now through 5/31 for memorial day with code CELEBRATEGS.***

The craziness is over! My wedding was wonderful, thank you for asking. I'd love to say I'm basking in sunny Cabo right now, but really I'm sitting in a freezing building in Gig Harbor Washington looking longingly at the bright sun rays shining outside wishing I was hiking Mt. Rainier or lounging on the beach. Family has come and gone, and now it's (as Rhianna so eloquently put it.) Work, work, work for the holiday weekend. Speaking of the weekend and sunny, sunny Summer, if you aren't workout ready, or activity ready, you should definitely check out the new workout pattern from Greenstyle Creations. Angelynn has been leading the pack with awesome active wear patterns that have quickly become my favorite.

Let me introduce you to your new Summer crush, the Greenstyle Creations Moxi Shorts


The Moxi Shorts Feature
-Sizes 0-18 (hips size from 31" - 52")
-Waistband Zipper Pocket
-Briefs or Thong option
-Add-on Compression shorts
-Layered Printing (Also A4)
-No Trim Pages
-Sew with knit or stretch woven


I wore these for a quick jont in the park. Ghaa. It's so awkward to have someone take pictures as you run by them ... regardless. Here's how these shorts look while in motion. :P I used clear elastic in the waistband as recommended in the pattern and they hug tight enough to stay up while running but not so tight that they're uncomfortable. The fit is pure Goldilocks. 


The pattern is designed with bias trim to outline and give that true ready to wear look that you'd get from Nike or Underarmor. Honestly, they fit and feel just like my other running shorts if not a tad more comfortable because the waist is smooth rather than scrunched with elastic. I chose to sew the Moxi's in the recommended stretch woven and I attempted to do the bias the same, however stretch woven does not want to press without starch. (Lesson Learned, Starch Purchased) so I got creative and used the same nylon lycra for the bias trim as I used on the waistband. It actually sewed very smoothly when I did a single fold on the bias. 


I sewed the size 6 and I may try the size 4 next. (I'm sewing a pair for my sister who's a tad smaller than I.) So it will be a great opportunity to see which size I like better. My legs feel rather tiny in these, but I did discover that Angelynn made a "skinny leg" section to help you modify these shorts if you have "skinny legs." (This is news to me.) 


I think my favorite part of this pattern is the amount of time that Angelynn put into making the pattern perfect. Revision after revision she worked to create a pair of amazing running, beach, workout, hiking, lounging, active wearing shorts that look like the $60 kind you'd buy at some sporting goods store. No thanks. I'll make my own. ;)

Details
Fabric - 1yd stretch woven from Fabric Fairy $9.99
Nylon Lycra I had on hand
Shipping - ....6.50?

Notions - Clear elastic, thread $.50
Estimated Total Cost $26.99 less the pattern, 16.99. Not bad for active wear. :D
*I received this pattern for free for testing it before it's release.*

I have two more pair cut that will definitely see some Washington hiking trails this Summer... if I ever get a day off. :D
Rusty. Rusty is the word of the day. I'm blogging rusty, I'm fabric rusty. At least I'm not sewing rusty. You know the age old saying. "Like in sewing, once you learn to ride a bike, you always need to wear a helmet." That's how it goes, right? Close enough.

So I was gone. No one probably cares and that's legit. So here's the quickest recap I can muster.
Twitter style: I moved 2.4k miles, started a career in sales, left a 9 yr relationship, fell in love, and am getting married May 20th! #JerrySpringer

~~~~~~~~~~~~~~~~~~~~~~~~~~~~~~~~~~~~~~~~~~~~~~~~~~~~~~~~~~~~~~~~~~~~~~~~

Nothing motivates me more than a deadline... so Blam-o I saw one of my favorite designers put out a testing call for a cute dress and that was it. So here I am.

Let me introduce you to the Harbor Knot Tee's sexy sister, the Harbor Knot Dress from Striped Swallow Designs. :)


If you can't already see, let me tell you why this is an awesome dress. It is form fitting, curve hugging, leg showing, awesomeness. It can be dressed up with some statement jewelry and a blazer for a night out or thrown over a bathing suit and worn to the beach with flip flops. (Also, I received no less than 7 "wow" comments from my fiance... that's a winner to me.)

The Harbor Knot Dress features
-Long sleeves
-3/4 length sleeves
-Short sleeves
-Layered printing
-Sizes XS to XXXL 
-Video tutorial on knot


It comes with sleeve options, too. Short, 3/4 length, and long. If the knot looks intimidating, it kind of is before you do it once! However, Mandalynn makes it really simple by including a video tutorial linked directly through the pattern and voila! Suddenly it's as simple as pi.  


The Harbor Knot Dress was a very quick sew. It took maybe 1.5hrs after it was cut. (I sew slowly, especially because I haven't sewn in awhile. I'm extraterrestrial careful.) I could probably sew a second one in 50 minutes if I had a place to hook up my serger. Damn you, small apartments.


Something I love about all Striped Swallow Designs is that Mandalynn includes layers. So that means I only had the print and cut the XS size. Thank you lawt.  


It always helps that I had one hell of a photographer. Thank you, lover. :) He was all "stand up straight, look that way, POSTUREEEE, SMILEEEEE. It was really cute and obviously effective. :) One last thing you'll love to know, this dress is running around safe! I could bend over and the wind was blowing but there was no butt cheeks to speak of. It's so form fitting, the dress gives your booty a nice little all-day-long hug and doesn't let go. It's a simple design with a twist! I love patterns like these because I could make a million of them and they're not so "distinct" that everyone knows I have 4 of the same dress. 

Details
Poly blend knit from Joann's - $12.99 @ 40% off - $7.80 / yard for 1.5 yards = $11.70
Notions
Thread = $.50
Estimated total cost = $21.20 less the pattern = $12.20
I received this pattern for free in exchange for testing before it's release.

This dress is one sale for $7 for it's release!


I included this picture because I feel like storm and like I'm going to smite people. Pretty rad. 

And this one, obviously, because I like to complain about being cold, or being embarrassed while having my photo taken. Isn't taking pictures in public while people walk by the worst? Also, Washington is still really cold in March, folks. I didn't sign up for this s***.

So glad to be back sewing! Also, very glad to see some new, sexy patterns coming out. Moar sexy dresses, please. I love to sew what I'd already buy. ^^
*This post contains affiliate links to help me pay for fabric rehab*

Hey! Remember when I said I was going to take a break from testing? Yeah, me neither.

So I tested the new Itch to Stitch Lisbon Cardigan that released today. This is absolutely perfect for me as I'm a cold human that works in a large warehouse where I still have to dress professionally. So when I saw the style of this cardigan, I had to test it! What a great excuse to make more work clothes. :D

*If you haven't sewn an Itch to stitch pattern, you are in for a treat. The designer, Kennis, is a detail hound and you won't get through one of her patterns without learning something unless you've been a professional tailor for decades. Her patterns are very professional, yet completely approachable. If you want to test one out first, she always has the Lindy Petal Skirt for free here!* (Picture linked on sidebar)


The Lisbon Cardigan features
-Long sleeves
-3/4 length sleeves
-Full length
-Cropped length
-No hemming, everything is banded!
-Sleeves not cut on fold
-All pieces are notched
-Directions where to interface and which type to use
-Layered printing
-Sizes 00-20
-Tips on Hong Kong finish for seams


I sewed a size 2 for the chest, 0 for the waist, and 4 for the hips according to the size chart and the fit is spot on. The sleeves are the perfect length where they just slide over your hand a tiny bit. The over all fit is slightly relaxed but still fitted if that makes any sense at all.


My buttons are done pretty well, but the spacing is just slightly off on the actual buttons! It will get better with practice, but see that small pucker? Also, my bottom button is way too close to the edge. I only noticed after the button holes were done. Oh well, all part of the process. The next one will be even better. (You know it's a garment I like if I have a next one planned already)


I sewed this up in sweater knit that I bought from Sincerely Rylee last year in one of her mystery boxes that I don't think she does anymore. However, I got a great deal on lots of sweater knits and this was absolutely perfect, however I'm not sure of the exact fiber contents. If I wanted something a little lighter I would probably choose a rayon spandex blend or a cotton Lycra. Maybe this would be cute in a Ponte, too? So many things to try. I'd also like to do a V neck hack. (I'm always trying to push it... I don't do well in matronly clothing. :P) I do feel just a little classy in this outfit though. :D


Don't forget, the Lisbon Cardigan is on sale for 20% off right now! :)

Details
Fabric - aprox. $4 / yard for 2 yards = $8
Notions
Interfacing = $2
Buttons $3
Thread = $.50
Estimated total cost = $25.50

Itch to Stitch Lisbon Ad 300 x 300

I did receive the pattern for free in exchange for testing it before it was released.
Folks, spring is here and I am so happy! It's actually raining as I write this but I was blessed with a gorgeous week, so I'm not even complaining. My friend Emma rushed out with me for a quick photo shoot and helped me capture these awesome photos, thank you Emma! <3 

So I am back to testing! For some reason I can't take a break - I see a cute tester call and I jump at the chance to test. I enjoy the process and I enjoy a deadline. It helps keep me motivated. Plus I'm more likely to blog about it if I tested. I can't tell you the amount of "dead" items that I sewed and never told anyone about. Pictures are so hard to get sometimes!


This is the latest release from Lil Luxe Collection, the Women's Starlight City Dress. Previously it was a children's pattern company with very contemporary designs but LLC has been branching out into Women's wear and I'm very excited! I love the aesthetic of LLC and am excited to have some of my favorite designs made into women's patterns.


The Starlight City dress has a few fun options.

-Bodycon dress (my version)
-Gathered waist dress
-Gathered skirt and top separates
-Bodycon skirt and top separates
-Knee length or maxi gathered skirt
-Short, 3/4, or long sleeves


I sewed the XS based off of my bust and waist measurements and the fit is spot on for a bodycon dress. The waist has an interesting detail. The elastic casing is actually a "flap" that can flip up or down. it stays in place in the "flipped up" position because the elastic and negative ease keep it in place. This is a new to me sewing technique but worked out very well because there is no stress on the waist seam from the skirt. I'll try to get some detailed pics to demonstrate what I'm talking about and update this post. But it's comfortable and keeps the waist from being pulled down and sagging from the weight of the skirt portion.


Ok. Let's get to the important part. THE BACKKKKK! Do you love this as much as I do? Err Mer Gerd. I adore the back of this dress. Cut outs are very "in" right now and this dress is just perfection in the back. Also, if you'll notice my bra. No? You didn't notice my bra? Exactly. 

Jessica and Angie did a ton of leg work to make sure that your REGULAR bra was concealed in this dress. No special bra or duct tape to wear this masterpiece. That's actually not a huge concern for me, but for the bigger chested ladies, it's a total win. :) The twist in the back mixed with the deep V and no special bra really makes this a fun and unique wardrobe piece. It will be great for all those Spring and Summer weddings coming up!


All of my comments on the construction of this dress are based upon the testing version and I'm not sure of the changes, if any, that have been made in the final pattern. The version I sewed was the most updated version of the tester pattern. 
  • The pattern features layers, but you have to trim the pages. 
  • There are separate bodices for petite and regular torso lengths. 
  • The instructions are accompanied by illustrations that are very clear.
  • The bodice is fully lined, however the side seams are not enclosed. (You can easily enclose them, but the instructions direct you otherwise)
  • There are grainline markings
  • There are notches to match pattern pieces
  • The sleeves are not cut on the fold


I tossed on a thrift store men's shirt for a more casual "me" look and while the fiance disagrees, I think it's cute. I feel like a rocker or something. -_-
P.S. Is there a way to wear bright red lipstick and not look like a hooker? Especially at 3pm with randos jogging by. I totally fit in. Oh, the awkward things I do.


I definitely DID crawl through 1,000,000 spiders for these train photos. So, relevant or not, I'm posting them. 


Overall the dress was constructed quickly. The waistband instructions caught me off guard for moment but I was able figure it out. It was just an unexpected "new to me" technique but once I read it over, I was able to construct the rest without issue. I'm SO happy they made it where you get the sexy V and cut out but without the hassle of finding a special bra or going braless. Next I'll definitely be sewing the gathered skirt version. That is a little more my pace and I already have fabric purchased for it! :D Because lawd knows that the one thing I need MORE of in my closet is Spring dresses that are inappropriate for work.


Details

Pattern LLC Starlight City Dress $14 (I received the pattern free for testing)
Fabric Black and Patterned knit from Joann's $15
Notions Elastic and thread $.50

Estimated total cost: $29.50

I will be sewing this dress again! The twisted back bodice is so cute and on trend. I need at least one more. 
Make sure that you get the dress while it's still on sale. It's marked down to $9.80 through the week instead of the standard $14.

If you make the dress, make sure you #starlightcitywomens on instagram!
Hello from Sunny Washington! (Said no one ever.) Don't let these pictures fool you, I was freezing my butt off.

I'm bringing you something fun and new today, another bohemian beauty design from Mandalynn of Striped Swallow Designs. She recently came out with a girl's version of the Desert Breeze and I snatched it up right away for my nonexistent babies nieces. I absolutely adore the style of this top, it's going to be perfect for "Summer." (If that's a thing that happens here.) 


The Women's Desert Breeze includes several options.

-Flutter sleeves with cutout 
-Straight sleeves with cutout
-Flutter sleeves with cut out and elastic instead of binding
-Gathered waist dress
-Loose swing dress
-Loose swing top

-Fitted top (This will be an add on in the near future. A little birdie told me that it will be *free* to members of the Striped Swallow Designs Sewing Group! So join early and get first access to the add on slim fit top.)


I chose the slim fit with flutter sleeves and binding around the sleeves. Based off of full and upper bust measurements I sewed an XS and it fits like a glove. Full disclosure ... I feel like an angel. 
The construction of the Desert Breeze is ... a breeze. Everything comes together like a dream and it's relatively quick, too.

If you haven't used a Striped Swallow Design pattern before, you're in for a treat. Her patterns are laid out in a super pleasing manor and she thinks of the little things. (like putting the S/A on each page - so if you forget, which you know you probably will, you don't have to flip through 20 pages to find it.) She walks you through each step with detailed photos and at the end, you probably can't believe you finished with such an ace looking product. 
The binding instructions are great, too! Just look at how pretty my binding turned out in the picture above. I impressed myself. ;)
AND! The pattern pieces are layered so I was able to print just my size. #thankyoulawd

*Side note, I used a straight stitch for the binding and it turned out great! If anyone is like me, you might try to decide on stretch or straight stitch... we'll fret no more, straight works fine for this top on the binding.*


I did lengthen the Desert Breeze by 2". There are no lengthen and shorten lines, but it's pretty easy to do yourself. I just found the thinnest point on the front and back and cut and added 2" in between the pieces. If you are around my height 5'6", I would suggest adding a little length unless you are comfortable in shorter tops. Additionally, I haven't hemmed the sleeves or the bottom, so it's a little longer than it will be once I hem them!

The knit is a basic rayon spandex blend from Joann's. It's very drapey and buttery soft. I've always been a cotton lycra fan, but man, rayon has been winning me over lately. It cascades in a way that the cotton doesn't. I'm thankful that I couldn't find a print that I liked. I need to sew in more solids, this top feels so elegant in a cream. 


Thanks to my awesome fiance for the pictures (and necklace). I feel very delicate. :)

The Women's Desert Breeze is releasing today 03/28/2016! You can find it at StripedSwallowDesigns.com Women's Desert Breeze and Bundle and you can get it on sale with code "BREEZE" for 25% off (it's on the entire store, too!) I promise that it will be a Summer staple :D 

Details
Pattern Women's Desert Breeze $12
Fabric rayon spandex from Joann's $16 for 2 yards (with leftovers)
Notions thread $0.50

Total estimated cost $28.50

However I did receive the pattern free of charge in exchange for testing my size and I didn't use 2 yards of fabric. I probably have 3/4 yard left over.
It's Monday! I've got some good news for you ladies on the 9-5. Itch to Stitch came out with a new collection today and all the pieces are perfect for work! You can see the entire collection here. I tested the Zamora Blouse and I'll share some thoughts with you below and a million pictures. 


The Zamora Blouse is a deep cut Pussy Bow blouse with pin tucks and darts galore. It features gently gathered sleeves and cuffs, waist and bust darts, curved hem, and staggered pin tucks down the front. The buttons on the front are fully functioning because this is a fitted blouse. You may be able to slip it over your head, but most likely not. The design is fantastic and totally my aesthetic. It's slim fitted and low cut but still work appropriate. That's a win on all accounts for me. :) 


Here's a close up of the pin tucks on the front. There are 4 on each side. Pin tucks are a labor of love. But when treated with patience, damn. They look so nice! The instructions on this part are fantastic if you've never sewn them before. Kennis explains it very well! The top piece is staggered for each tuck and each fold lines up perfect after all the tucks are sewn in place.


I did struggle with the waist darts. I've sewn darts before but every dart I've sewn has been on the edge of the fabric in some capacity. The waist darts on the front and back are in the middle of the fabric which was a little more fiddly, but it really helped to create a fitted blouse and was totally worth the struggle. (Plus, great practice! I love getting new skills under my belt.)


I blended sizes to create my blouse. The pattern comes with sizes 00-20. Based on my measurements, I sewed a size 0 for the waist 27" - size 2 for the bust 34" - and size 4 for the hips 37", and a B cup. Blending these sizes was easy because the Zamora features layers, so I just printed the three sizes I needed and gradually blended them together as I cut the paper out. The fit feels fantastic. There are some visible drag lines under my bust. Unfortunately I'm not experienced enough to know what caused this or how I can fix it. So I'll be doing some research!


The back has a small pleat and two darts at the waist. I meant to photograph the inside of my blouse, too. Unfortunately I forgot but I did do french seams, so the inside is pretty neat, too.


Note to self: Read. This pattern comes with cup sizes, so if you are a C cup and a size 6, you'll sew a different size than if you're a B cup and a size 6. It's pretty fantastic and helps to customize your fit without a ton of modifications you have to do yourself. All this being said - there a lot of pages to print that you don't need (you only need your size / cup size) Kennis provides a print chart on page 5 to tell you what pages you need to print according to your cup size, then you can choose to use the layers function and only print your specific size.
Can you guess already? Yep. I printed every page and pieced them all together before I realized that I was taping together a D cup. So not my chest size. :) So, check out page 5 before you print! You're welcome. :)


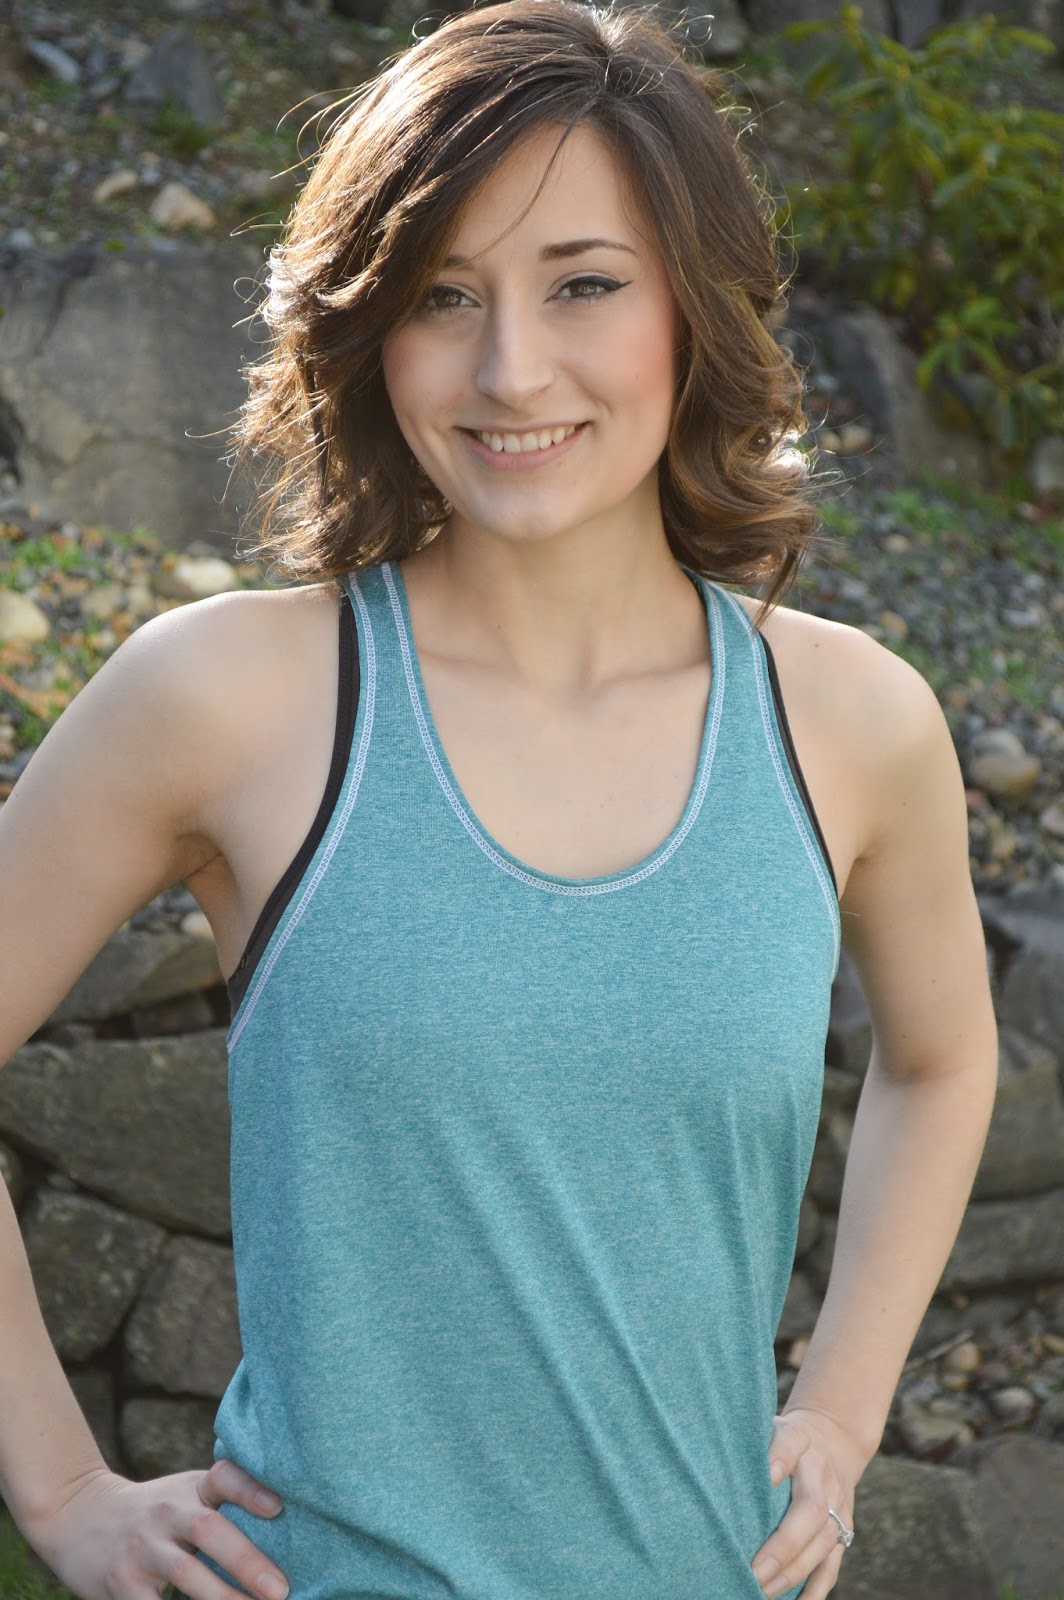
This is my "I'll totally answer the phone and do professional office work, but I'll also probably wink at you." Outfit. It got second glances from the fiance... which is saying something if he's immersed in League of Legends. 


Here's my lay flat picture. So adorable! Can I confess that I actually hate this fabric. I love the buttons, but the fabric is bleh. Blue is just not my color, yet somehow I own a TON of blue. Fabric aside, I love my blouse. I will be making more for work! I actually wore it for work today and got a ton of compliments. 


This is a little less test related but more ... "I got my new sewing machine!!!" related. JUST LOOK AT THESE BUTTON HOLES! HOLY CRAP! It was such a breeze to sew these button holes. No muss, no fuss. I even did extra buttons because I picked up a smaller size. (Hey, they matched so well!) That's pretty unheard of though, amirite? Extra button holes by choice? Yes, I have lost my mind. Directly into my Janome Skyline S7.

 YAAASSSS!

I loved sewing the Zamora blouse. It was a total labor of love. I believe I spend about 6 hours on this blouse alone. I opted to do french seams as my fabric was so prone to fray. All the darts and pin tucks took time, however - wasn't it totally worth it? I am super proud of this blouse and I can't wait to have a collection of them. I believe Kennis puts a ton of work into her patterns to make them impeccable.
There is everything you'd expect in a professional pattern, grain lines, notches, (I believe it's called trueing? When all the folds for the pin tucks make a straight line when they're sewn?), cup sizes, encased neckline and cuffs, drawn instructions, clear directions, layer printing, printing layout, tips for new techniques, and a classic design.

If you are interested in the Zamora Blouse, you can get it here.
The new releases and entire shop is on sale through March 13th, 2016 with code 4releases

Details
Fabric: Clearance at Hobby Lobby Fall 2014. 2 yards $12
Notions
Buttons: $.99
Thread: $.50

Estimated total cost $25.49

I received the Zamora Blouse pattern for free in exchange for testing it.