Showing posts with label Knit. Show all posts
Hey friends! It's that a time again where I show off some more awesome Striped Swallow Designs! For my promo this month I chose the Harbor Knot Tank. The Harbor Knot Dress is already a favorite of mine. (And my husbands!) So I knew the Harbor Knot Tank would be a staple this coming Spring and Summer. Also, I've been dying to find a great racer back pattern since I found my favorite little black tank is developing a hole in it. I've owned it since I was 15 though... so I guess 10 years is a good life. Haha

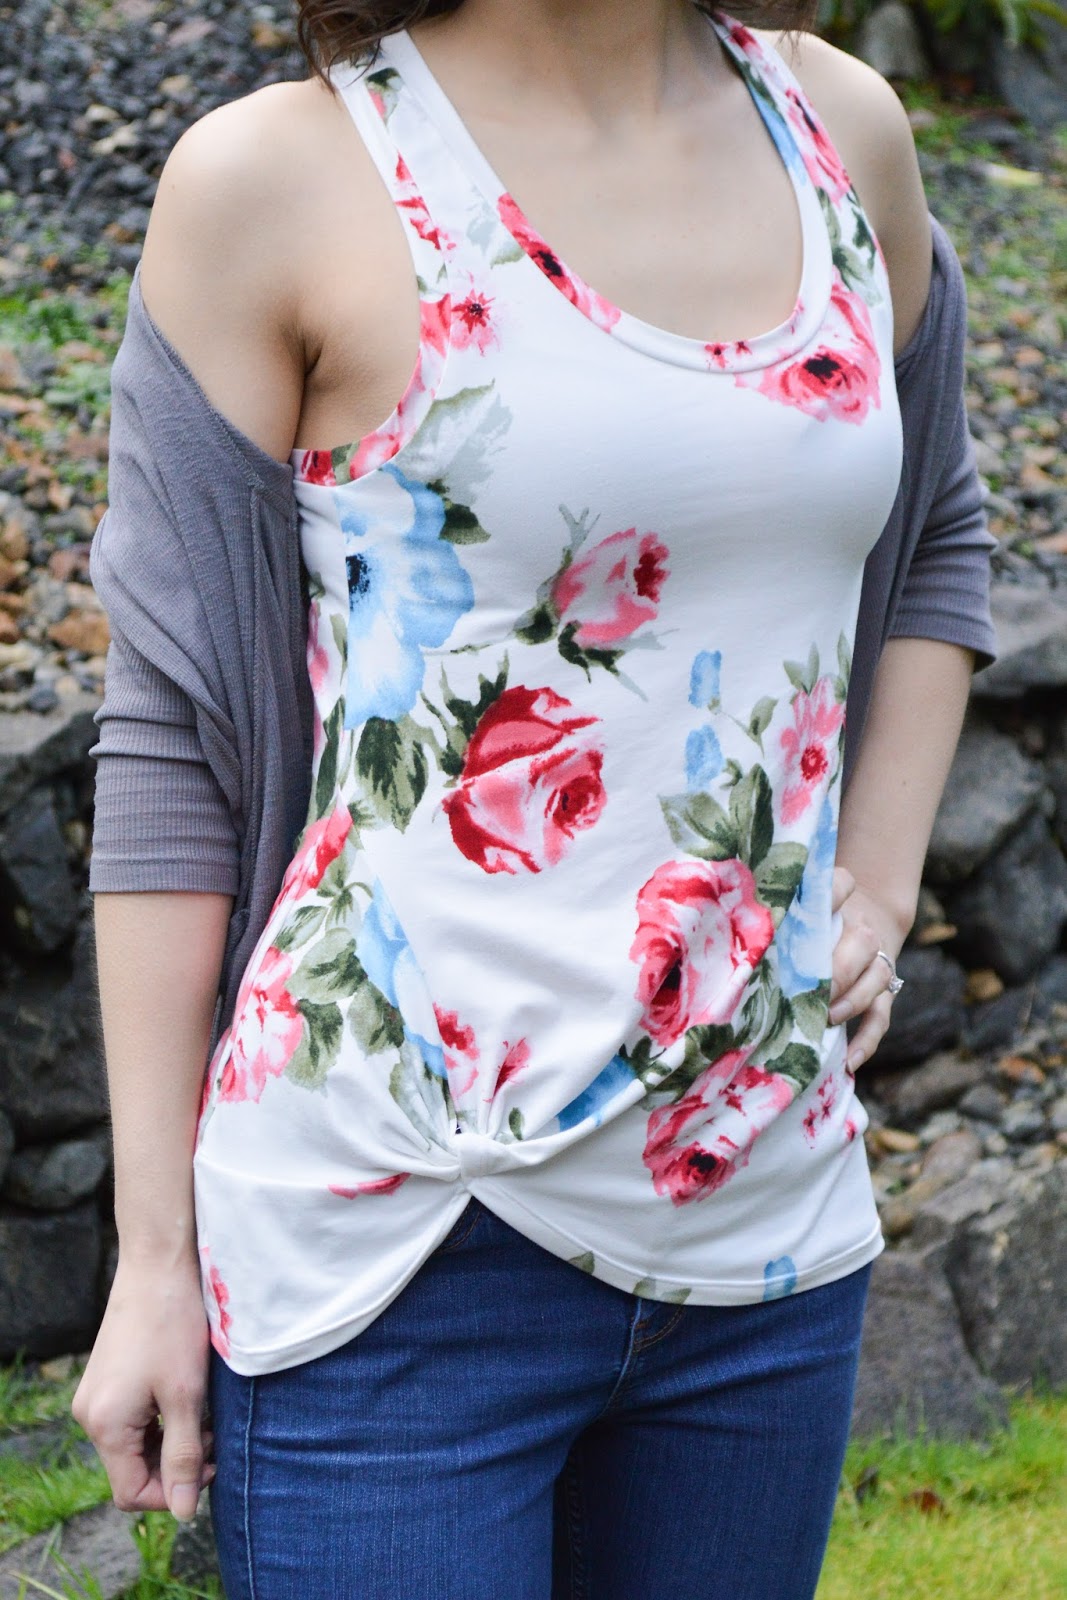
I picked a really fun and floral double brushed poly from Simply By Ti Fabrics for this project. (If you like this floral, it also comes in navy! I'm sewing up a pair of jammies with it soon!) I only bought 1 yard but it was plenty for this quick tank. I sewed the low knot, slim fit, racer back tank in size XS according to my bust measurement and the sizing chart.

The Harbor Knot Tank is an add-on pattern for the Harbor Knot Tee. The best part about the tank is you can do a high knot/loose fit,
a low knot/slim fit,
a full tank back,
a racer tank back,
or a "simple tank" without the knot.
I was so excited to see that there was a racer back option because I've been searching left and right for a great pattern to recreate my favorite racer back but I didn't want to spend  $10 on a simple tank pattern yet still didn't feel comfortable enough creating it myself. I love the Harbor Knot Tank add-on because it has multiple options so you're not just paying for a simple racer back, you can make 5 different styles!

Spoiler alert. I'm only going to make one style though. Because that's how I roll. Racer back slim fit Harbor Knot is my entire life.


I made this tank like ten days ago and have worn it about 4 times already. Two of those times was to work! Nothing makes me feel better going to work than sporting a little me-made garment. In the middle of the sale I can always think to myself, 'If I can make this, I can do anything!' Helps boost the confidence. :) That's the other thing I love about this tank, it's pretty simple and quick! Add a cardigan and it becomes completely work appropriate. The knot is what makes it special, though, don't you think? It takes this otherwise casual tank to something special that can really be dressed up.


Although the weather is freezing here, I can't help but to plan some summer clothing, too. Thankful that layering is a thing! I can already tell I'll have 3 or 4 of these for 2018 and cycle out some of my less used RTW clothing.


I think for my next top I will create a binding rather than a 't-shirt' style neck and armholes. I like the binding look a little better. Feels like it dresses it up even more to me. Also, my favorite black racer back has bound armholes and neckline so I'll try to keep it as close to that as possible. :)


(Can you tell I'm freezing? It's like 35 degrees. It actually hailed right after this picture!)

I sewed this up in a quick 2 hours before work one morning. Once you get the knot part down it's a  really simple sew. Thankful to Mandalynn who created a video tutorial in the instructions so you don't have to guess!

Details
Size sewed XS

Make sure you check out the Striped Swallow Designs sewing group on Facebook where you can always receive 10% off your purchase and also check out Simply By Ti Fabrics for great deals and lightening fast shipping. :)

No affiliate links were used but I did receive the pattern and fabric for free both from separate ambassador programs with Striped Swallow Designs and Simply By Ti Fabrics.
 
So, first up on my handmade wardrobe is more work clothes. It's finally time to admit it... I work five days a week (sometimes six) and ten hours a day. I'm at work no less than fifty hours per week and I have about two days of play which account for approximately thirty-two hours of "free time." I don't need more dresses, I need more work clothes. Warm work clothes.


Let me introduce you to my new favorite blouse, the Brasov Wrap Top from Itch to Stitch Designs.
I have loved Kennis' Designs for awhile now. They have the professional drafting of "the big 4" (notching, markings, grainlines, finishing techniques, etc) but with better sizing and directions but the benefit of her group which allows you to ask questions!


At first, I wasn't convinced on this design. I am a small busted girl and high necklines can look unflattering on me so I wanted something lower cut. But after sewing this up, I can't wait to make more. I'll be real with you, including cutting, this top took me about 4 hours which I feel is super excessive. It has a lot of details, but next one should be about half that time. Maybe I was just slow moving.


My standard size in ITS is 0/2/4 bust/waist/hip but since this was knit I chose to do 0/0/4 since I like a more fitted blouse. The only changes I made were on the shoulder pleats. I sewed them 2.5" down (the same as the waist pleats) because I misread the pattern. Turns out, if you're small busted, Kennis suggests you lengthen the shoulder pleats anyway! Accidental win!


I bought the fabric from Cali Fabrics when they had their black Friday sale. It's DBP. I believe they still have white in stock but the black is almost gone. It's soft, cozy, and stretchy. Just what you'd expect from DBP.


I already have two more planned. For the next one, I'll size down once again. 00/0/2. The one thing I noticed is because I sized up on the hips two sizes the ends poke out to form kind of a bell shape. So I'll avoid that this time by keeping the waist and hip portion a more similar size. Plus it's knit, so it will stretch! My measurements are 32/27/37 and finished garment for 00/0/2 are 34/28/36


This has been an awesome addition to my work wardrobe and it's warm! Glad to have my closet growing with professional clothing. Thank you, Kennis!

Details
Pattern: Brasov Wrap Top
Size: 0/0/2


This post contains affiliate links to help fund my handmade wardrobe project! Thank you for your support.

Hello from Sunny Washington! (Said no one ever.) Don't let these pictures fool you, I was freezing my butt off.

I'm bringing you something fun and new today, another bohemian beauty design from Mandalynn of Striped Swallow Designs. She recently came out with a girl's version of the Desert Breeze and I snatched it up right away for my nonexistent babies nieces. I absolutely adore the style of this top, it's going to be perfect for "Summer." (If that's a thing that happens here.) 


The Women's Desert Breeze includes several options.

-Flutter sleeves with cutout 
-Straight sleeves with cutout
-Flutter sleeves with cut out and elastic instead of binding
-Gathered waist dress
-Loose swing dress
-Loose swing top

-Fitted top (This will be an add on in the near future. A little birdie told me that it will be *free* to members of the Striped Swallow Designs Sewing Group! So join early and get first access to the add on slim fit top.)


I chose the slim fit with flutter sleeves and binding around the sleeves. Based off of full and upper bust measurements I sewed an XS and it fits like a glove. Full disclosure ... I feel like an angel. 
The construction of the Desert Breeze is ... a breeze. Everything comes together like a dream and it's relatively quick, too.

If you haven't used a Striped Swallow Design pattern before, you're in for a treat. Her patterns are laid out in a super pleasing manor and she thinks of the little things. (like putting the S/A on each page - so if you forget, which you know you probably will, you don't have to flip through 20 pages to find it.) She walks you through each step with detailed photos and at the end, you probably can't believe you finished with such an ace looking product. 
The binding instructions are great, too! Just look at how pretty my binding turned out in the picture above. I impressed myself. ;)
AND! The pattern pieces are layered so I was able to print just my size. #thankyoulawd

*Side note, I used a straight stitch for the binding and it turned out great! If anyone is like me, you might try to decide on stretch or straight stitch... we'll fret no more, straight works fine for this top on the binding.*


I did lengthen the Desert Breeze by 2". There are no lengthen and shorten lines, but it's pretty easy to do yourself. I just found the thinnest point on the front and back and cut and added 2" in between the pieces. If you are around my height 5'6", I would suggest adding a little length unless you are comfortable in shorter tops. Additionally, I haven't hemmed the sleeves or the bottom, so it's a little longer than it will be once I hem them!

The knit is a basic rayon spandex blend from Joann's. It's very drapey and buttery soft. I've always been a cotton lycra fan, but man, rayon has been winning me over lately. It cascades in a way that the cotton doesn't. I'm thankful that I couldn't find a print that I liked. I need to sew in more solids, this top feels so elegant in a cream. 


Thanks to my awesome fiance for the pictures (and necklace). I feel very delicate. :)

The Women's Desert Breeze is releasing today 03/28/2016! You can find it at StripedSwallowDesigns.com Women's Desert Breeze and Bundle and you can get it on sale with code "BREEZE" for 25% off (it's on the entire store, too!) I promise that it will be a Summer staple :D 

Details
Pattern Women's Desert Breeze $12
Fabric rayon spandex from Joann's $16 for 2 yards (with leftovers)
Notions thread $0.50

Total estimated cost $28.50

However I did receive the pattern free of charge in exchange for testing my size and I didn't use 2 yards of fabric. I probably have 3/4 yard left over.
Hi friends - something a little different today. I don't know if you know, but I have approximately 1,000,000 nieces and nephews and sometimes, just sometimes, when I'm not feeling lazy, I sew for them. :) 

I thought I'd start sharing some of those. You may be interested, you may not. (sorry) but I always love seeing new renditions of my favorite patterns.

I sewed two patterns from two designers for my littlest niece A. She's 5 months now and just cute as can be. If I get some pics of her in it, i'll update. ^^


The hat is the Trendy Beanie from Puperita Patterns. Annalisa is the designer behind Puperita and it's one of my favorite brands. All of her patterns show attention to detail and they turn out like the pictures. She teaches great techniques and many of her garments are fully lined. I can't tell you enough how great her patterns come together. Plus, she's super active in the Puperita Facebook group - so if you need any help, she or one of the admins will walk you though anything you need assistance with.

This hat is no exception. It's a super quick sew and comes out very cute! Reminds me of the nursery rhyme Winken, Blinken, and Nod.


The pants are the classic Maxaloones from Max and Meena.  I have only sewed one of their patterns (this one and several times.) but the instructions and photographs are very easy to follow! M&M are popular for this pattern! Practically everyone has made it or has seen it at a craft fair. 

If you're not familiar, they're "grow with me pants." The pattern includes sizes NB-5y.  Each size fits a range of ages. The one I sewed will fit from 6 months to 3 years. The legs and waistband extend to allow for growth. The bum area fits cloth or disposable diapers so even as the kid ages, there is room for a growing butt / legs / chunky baby thighs. (I'm baby shaming now.) Plus, the contrast butt is just too cute. 


Details

Patterns 
Fabric
Birch organics interlock knit - 2 yards+shipping - $25
Hat tie - cotton/lycra scraps - free
Notions 
Thread $.50


I almost started this post with "not pattern testing" ;) but this wasn't exactly a completely "for me sew" either ... I promised my sister this dress with different fabric, so this was my muslin version of a pattern I purchased for her. I'm so happy with it! In fact, I texted her a picture of this and she said "is that my dress?!" and I had to tell her no. Hahaha :) She's getting a cool one though, you'll see it soon!


These pictures were taken by my sister outside my parents house and the lighting was so awesome - I only wish I had a different model so I could take the photos. I'm so particular, I must be a freakin' nightmare to take photos of. Love you, loved ones who help me, even if I'm a little shit when you didn't tell me my hair was puffy during prime, gorgeous, golden-light hour. 


Onto the dress! I love this fabric. I love, love it! I got it from Summit Fabrics and More on Facebook. She's from North Pole, Ak and I visited the North Pole once so, that's cool. (They have candy cane light poles. Legit.)


The pattern is the famous Lady Skater Dress that everyone has made at least once in their life. And for good reason! It's comfortable, cute, and fits great. Some of my favorites are from the ever loved Lladybird from right here in Nasvhille. <3 Here is her Lady Skater Tag if you want to see the ones she's made. :D


My not so secret, secret: I've always wanted to be a fairy.


I wish I could write a fountain about this dress but I don't think that there is anything left to say about the actual dress. I sewed a size 3 and it fits great. I like that the pattern has you put the seam of the neck band in line with the shoulder - it makes it more seamless. I've gotten tons of compliments on this dress, even from my boss who is always telling me i'm breaking dress code. (Rebel) I originally left the dress un-hemmed as to keep the length so it would be "work appropriate" but now I just like the look of it with the birds.


I see more of these in my future, I feel like I need a wine red dress with 3/4 length sleeves and a cowl neck. 

Details
Pattern: Lady Skater $11.14
Fabric: Poe Birds on White 2/yards at $9 yard = $18
Clear Elastic for waist and shoulders: $.50
Thread and Needle: $.50
Approximated total cost: $30.14

Just for fun, here's my sister and her friend that I snapped after my photos were taken. I'm so super proud of this lighting - because obviously light is something to be proud of - as if I make light.....


*Do you like the use of my Oxford Comma? If you know what that is and you share the same opinion on said comma, we are friends.*

Don't ask me why I look like I want to murder someone. Maybe it's because this shirt turned out shitty? I'm not sure. Don't judge. That's just my face.

P.S. Those are not pickles on my shirt. Just sayin'. Not pickles.


As a rule, I like tighter fitting clothing but I loved the flowy-ness of the Free Spirit Tank from P4P though, for some unknown reason I decided that I wanted it to be flowy but not too flowy... so I removed the very feature of the shirt that it's based on... because - that's normal.

I mashed it up with the Nettie Body Suit from Closet Case Files (Which is known for being ... a bodysuit ... so tight. haha). I used the Nettie neckline, and tapered from the size 10 Nettie to the handkerchief hem of the FST. And... this is the result. HA! HA! 


Now that I'm done making fun of myself, I can say that I DO love the neckline. I chose to turn under and hem rather than put on neck and arm bands. I like the result, though it has made the neckline a little wide so the straps are prone to slip off my shoulders.


This pics were taken pre-haircut with crazy hair. I would say "crazy hair; don't care" but I'm mentioning it so obviously I do care a little. #Insecurities! ;)


This knit hangs a little funk. It's really soft, but it's Hobby Lobby knit. (Basically this means I don't expect much) I like the style of the hem and maybe next time I'll try to not hussy up my clothes and have a flowy tank like a normal human. And I suppose I'll continue to blog my "not so successful makes" - maybe I'll look back and be like, "dayum... I've gotten so much better!" In a few years.

All in all I do still wear this shirt and it looks cute with a pair of skinnies and a cardigan for work but next time I'll leave the pattern mashing to the pros D: 

P.S. Why isn't Flowy a word? It's not spelled flowey either... flowie. None. Flowing. Sure English - make watery a word but not flowy. You totally make sense.

Details
Not pickle fabric from Hobby Lobby - $6.49/yard for 1 yard = $6.49
Notions: Thread $.50
Total $6.99 for a new top. :D 
This Post Contains Affiliate Links

So It's not really a secret that I'm a Greenstyle Creations fan. If it is, well, secret's out! ;) When Angelyn started a new test for *new and fancy* workout leggings, I was thrilled to test them! This pattern is called the Stride Tights and they are my favorite thus far... let me tell you why.


The Stride Tights offer a TON of options. You can choose from full length, cropped, capri, or shorts. There is an optional crisscross cuff, waistband pocket, full diamond gusset, side pockets, and a killer design feature - the contrast piece connects in the back! It's very flattering and takes these tights from handmade into RTW clothing. 

As always, the testing experience was amazing - Angelyn takes tester feedback seriously. (and I'm never going to quit mentioning that so sorry, you'll read it every time. I think it is super important and not all designers do this!) I sewed a straight size small by following the size chart and they fit perfect. 


*Hello World. I have a confession*

This is what I want people to think I'm like ^^
But this is what I'm really like, haha vv
(The amount of photos I edit out is ... ridiculous.)


Take note of that side pocket! For this pair I chose capri length with a side pocket on each leg. It's much deeper than my ID, but I wanted to show that there was an opening there. It would be perfect for your debit card, ID, and some spare cash or a key. (maybe even an Ipod... Do those exist anymore? Ack! I'm getting old quick.)


This is the optional waistband pocket that can be put at the front or back of the tights and is perfect for holding your key safely. (I would show you a detail shot of the gusset because it is a full *awesome* diamond that stretches even in the splits - but I didn't want to cross the line into "Awkard crotch shots.") (because there is definitely a thing of "not-at-all-awkward crotch-shots.")

If you read my previous post on the Inspire Tights, you might remember that I had trouble putting in the waist band pocket... Well, history had to repeat itself and *this* was the SINGLE part I had to unpick and redo. (Read Kyema, READ!) But I asked Angelyn for some more pictures to aid in the directions and you'll never guess what she did... Oh... maybe you will. Yep, you're right. She added more pictures! YAY! Now it's pretty straightforward, even for me! 

Really, I'm just trying to be consistent. You know, ... bad at pockets the first time, just stay bad at sewing pockets. Consistency is a quality I hold dear to my heart.


The second pair a sewed is out of this world! (Insert eye-roll). I purchased this fabric from the TheFabricFairy.com and I'm only telling you that because the shipping BLEW MY MIND it arrived so fast. I am a forever fan. Plus she offers some gorgeous swim materials! 


This pair I chose capri length, too but with the more advanced optional crisscross bands at the bottom. These weren't hard, so don't be intimidated! If anything, just slightly time consuming to make the little straps - but totally worth it, don't you think? 
I also put one pocket on the right leg but the other is without. If I offer myself too many pockets I start pack-muleing... Lotion, M&M's, extra deodorant... It just gets real messy, real quick.


And here is my derriere, because you definitely needed to see this. But really, see how the side panels curve around and meet in the back? Does't that look awesome?! It's very flattering on all the versions I've seen - I'm not simply complementing myself. Haha. (The pattern placement on the right cheek just cracks me up, but totally unplanned. Just glad they don't match!)


So here I am using these tights to their full ability... Sitting. Isn't that the best way to model active wear? Me and my railing think so. 


Nick said I "look creepy" when I make eye contact with the camera.... So here ya go. Less creepy? I don't know. Help me with these things, I sew, I don't model. 
P.S. Why is my shoulder always so creepy? It never looks that large IRL... and don't mind my double jointed elbows... they always look scary. (I know, I know. Quit pointing that stuff out, right? You probably never would have notice how it rolls all the way around to the front... sometimes it's gag worthy but it's mild here. I'm done!)


The Stride Tights from Greenstyle are my new favorite piece of work out gear. I hope Angelyn never stops making new active wear because I love sewing it! These two testing processes have taught me so much and I'm really thankful that I was picked. Had I not been picked I feel that it would be many months/years before I attempted a pattern like this. I would have thought "that is above my skill level." If YOU are feeling that way. Don't. I'm not telling you how to feel or anything. But DON'T Feel that way. ;) The directions are so clear, I am so confident that you can do it, too! Don't wait to jump into active wear sewing, it's really rewarding and it definitely inspires me to do yoga or go to the gym - it's a super confident feeling knowing you made it and it looks like you bought it. Win. I just want to sing Stride Tights praise to who ever will listen. They are awesome! <3

Details
Fabric for Purple pair was provided by Angelyn for testing purposes. The peacock fabric is nylon/Lycra from Ebay. The purple is an unknown mesh.
Fabric for the Galaxy Stride Tights: Both fabrics are nylon/Lycra (swimsuit fabric). Galaxy $11.49/yard for 1/yard plus Black $8.99/yard for 1/yard =  $20.48 plus $5 shipping. Fabric = $25.48
Notions: Thread $1.00, Clear Elastic $1.00
Total Estimated Cost: $27.48/2 pairs of Stride Tights =  $13.74. (About $19 each had I bought the material for the peacock pair, too.)

I was provided fabric for my first pair of tights and the final draft of the pattern free of charge from Angelyn of Greenstyle Creations but all opinions are my own. Sans fabric or free pattern, I still think these tights are damn awesome and you should probably add them to your workout collection, you will be happy and you will be lookin' fine. That is all.
Though it's been a short time since I've been sewing, I've been lucky enough to be chosen as a tester for some pretty awesome designers which I will be featuring  in the coming weeks. I think where I contribute most is by being newer, I studiously follow directions, identify areas that are hard for beginners to understand, test fit for my size and, unfortunately, nit-pick about grammar. ;) (Which is hilarious because i'm a terrible speller, thank god for auto-correct!) 

Most recently I was testing a pair of knit pants for Patterns for Pirates designed by Judy Hale. The idea behind the SOS Knit Pants is that they can be Skinny or Straight, jeggings or work wear, date night or office attire. You get the idea.  I sewed up the straight leg version seeing as i'm part of an office...
Judy designs some of my favorite patterns, (which I feel are really under-represented in the blogging world but very celebrated on Facebook, can't we  just merge the two already?) her style is very modern, RTW, comfortable, wearable styles for ladies. Sometimes I feel like it's hard to get all those in one designer! Also, her PDF's are no trim pages. Hallelujah! As compensation for testing this pattern, I did receive the final pattern for free, though all opinions are my own. :)

This is my second pair, and my first successful pair, of the SOS Knit Pants. Let me start off by saying THESE ARE SO DAMN COMFORTABLE! It's like i'm wearing secret pajamas to work. Seriously, it's my favorite secret. I work at an office currently and I have to sit down all damn day and these treat my belly to a soft hug for 8 hours.


 In the first round of testing, the waist was really high but by the end of the pattern, it had been lowered to the perfect height. I mean, right? That rise is simply perfection. 


(but what is up with those pockets?) 


One thing that bothered me about these is no matter the material I used, I was always able to see the pockets! I guess that's the price you pay for comfy knit pants. It really wasn't nearly as noticeable when my shirt was down. (Obviously I wear my shirt up like this at work.) I even trimmed down the pockets and they were still visible. Next time I'll probably do faux pockets on the front to eliminate that.


Here I am standing in front of a bush looking lackadaisical... 
Something I really liked about all this pattern is it has TONS of top stitching details to make the pants go from homemade to handmade. Unfortunately for me, I don't have a cover stitch machine yet so this meant I had to change from double to single needle about 15 times.... one more reason I need a second machine. ;) in the end though it was totally worth it. My fiance even commented how he never would have guessed they weren't store bought because they looked so "professional." Winnnnn.


My first pair was a little..... less successful. This blog is about progress, so I'm going to share anyways! The pictures were taken moments before a torrential downpour, so excuse the vampire flash skin. 


*Toss on my nice jacket, brush off my shoulders* I was SO excited I had sewn pants! 


And they fit awesomely! I did remove about an inch from the rise. (This was lowered an inch in the final pattern, so it's about accurate.) I posted pictures, feeling pretty proud... then Judy informed me that I had sewn the yoke in backwards.... how does one even do this?! In case you're wondering, yes, I have seen pants before, I promise. 


Yes. Backwards. 
*Side note, if you want to feel awkward, go outside in front of your neighbors while it's lightning and thundering and ask your fiance to take closeups of you butt while you are strangely overdressed for 6pm on a Wednesday.


See those visible pockets? Somebody halp! Thinner knit? Faux pocket?


I'm so happy that I sewed up a second pair. Much more wearable. The first pair was also done in a active wear fabric and was much thinner than anticipated. Why does my local Joann's have cornflower blue and camel ponte but not black? Go home Joann's, you're drunk. 

I really want to sew up more of these in many other colors ... you know, more black and maybe some gray. All the pretty office colors. 

If you're interested in purchasing this pattern you can find it here for $8.
If you want to see more pics from other testers you can find those in Judy's Facebook group!

Details
Size: S
Fabric: Black suiting from Joann's, scrap cotton / lyrica for waistband 
Notions: 1" elastic
Price: 12.99/yard - on sale 50% off at 1.5 yards = $9.25ish, elastic: $1. Thread $.50 Total price = $10.75
Alterations: None